Creating a New Site
“The farm” is a reference to the humwp.byu.edu site. On this site, we can create mockup sites before they go live. The process generally goes like this:
- We are contacted about creating a new site, whether it’s migrating an outdated site or starting a new site completely from scratch.
- After reviewing what kind of functionality or aesthetics their site will need, choose a theme from the installed themes options. (NOTE: Do not choose a theme that has the theme name and then something else. Crawford is a good example because the Writing Center specifically wanted that theme. There’s “Crawford” theme and then a “Crawford-BYU-Writing” theme. Always choose the theme with just the theme name, nothing else attached.)
- Create a basic site with the pages they’d like and some of their content. Try to match colors. Send them this rough draft and ask how they like it. Most of the time, they will be satisfied with the theme you chose and the direction you’re taking things. It’s not common that they will want to do something completely different than what you’ve already started.
- Work with the person until the site is finished, then let Tory know that it’s ready to go live.
How to Create a New Site
- Login in to the humwp website with the normal credentials.
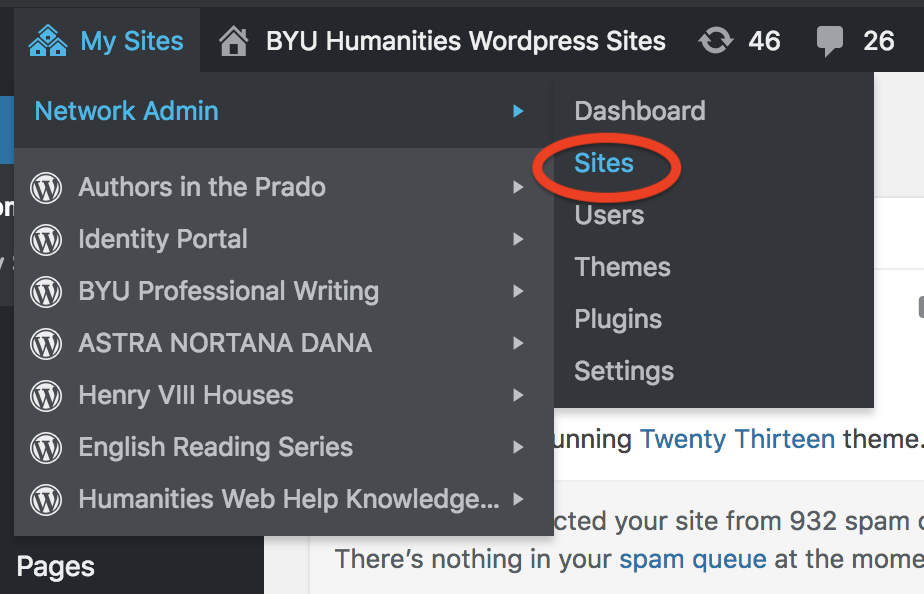
- Hover over “My Sites” at the top, wait for it to drop down, then hover over “Network Admin.” Choose the option that says “Sites.”

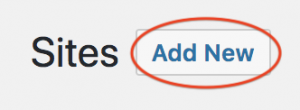
- You’ll come to a long list of sites. You only need to look for the button right next to “Sites” in the upper lefthand corner that says “Add New.”

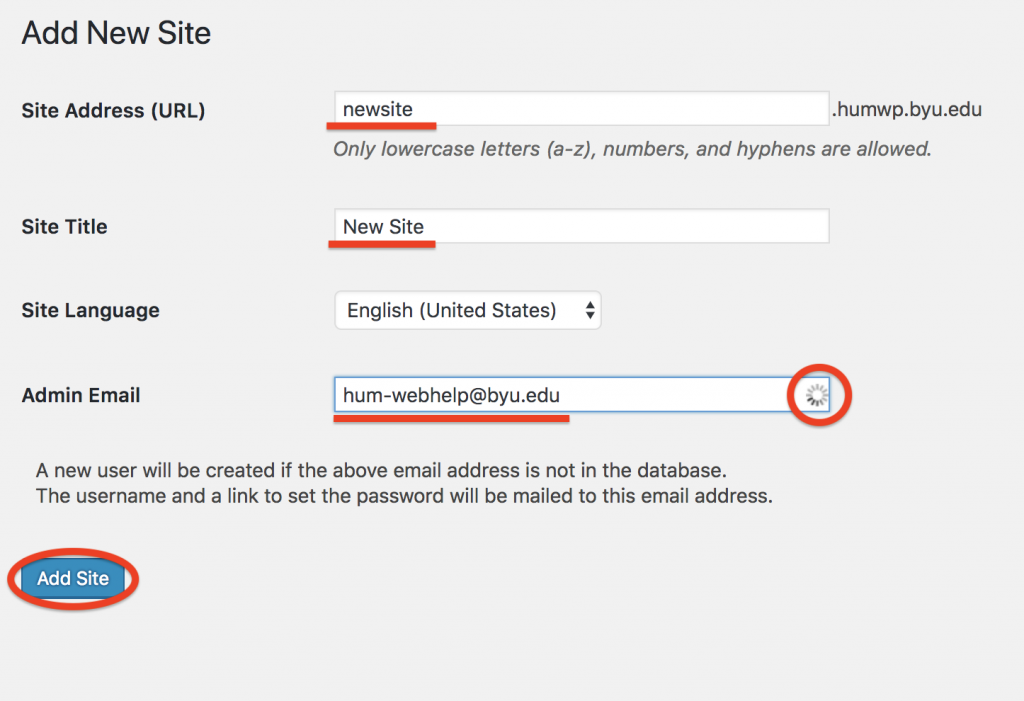
- You’ll come to a page where you’ll fill out the basic info about the new site. You need what the URL will be (the shorter and easier it is, the better), what the site title will be (doesn’t matter how long this is), and always use our email address as the admin email address. You’ll see a little loading icon beside the email address. That will never go away, so don’t worry about it and just click on “Add Site.”

- The site will now appear as the last one on the list of sites currently on humwp. You can hover over it to get different options, like “View,” “Dashboard,” “Trash,” etc. You’ll also see the date your site was created.

- To start working on the site, choose “Dashboard” and use it like any other WordPress site.
